As some of you may already know, our team of Customer Engagement monkeys are truly a dedicated and hard-working bunch. And one of our favorite things to do on the blog is to share some of their top pieces of advice to all of you equally dedicated and hard-working survey designers out there.
Let’s jump right in and see what they have to share, shall we?

Melissa: Include open-ended responses in an easy-to-read PDF
So there you are, sitting amongst the hundreds of responses you’ve collected and analyzed for a very important survey, and now it’s time to create a great report. You want to make sure your respondent’s voice is heard by taking these results and creating a brilliant business strategy with your team, right? Well, exporting the data into an easily presentable PDF is a great way to share this data with your team. But what if the key to your next best decision is hidden in one of the comments (open-ended responses) of a respondent?
Not to worry. You can simply include the open-ended responses in your PDF export. There’s just a tiny step to add when setting up your export. Here’s what you’ll want to do:
- Go into the Analyze Results tab, and click Export All, located top right
- Click Export All and select the All Summary Data drop-down option
- Select PDF Format
- Here’s the trick: Don’t forget to tick the Include open-ended responses box
- Lastly, click Export, and you’re good to go
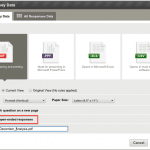
When you open your report, you’ll see all the open-ended comments included in your beautiful PDF summary. With a SurveyMonkey paid plan, you can also decide how to categorize those open-ended comments. Who said creating insightful reports was a pain? Pfft.
Luis: Let your respondents finish your survey at a later time

With SurveyMonkey, it’s easy for respondents to save the progress they’ve made filling out your survey—and complete it at a later time. That way, you’ll increase your survey completion rate. How? First, because you will ensure surveys are completed. Second, it’s a very convenient option for longer surveys that need a little bit of extra thought. Third, this option is very useful if your respondents want to come back to your survey and modify their initial responses.
Imagine that your respondents are almost done with your survey when the boss calls and needs their help—stat. With this setting on your collector, busy respondents can close the survey and finish it later without having to start over. Instead, when they come back, they’ll pick up right where they left off. To change this setting, take these steps:
- Click into the Collect Responses tab.
- If using a Web Link or Website collector, click the Responses Per Computer drop-down menu, and make sure it’s set to Allow one response per computer. If using an Email Invitation Collector, you’ll only be able to change Edit Responses, since the Email Invitation Collector only allows one response per respondent.
- Click the Edit Responses drop-down menu and choose the option, Yes, respondents can re-enter the survey at any time to update their responses.
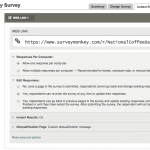
So the next time you’re worried someone won’t be able to finish your survey in one go? Enable this option and set your mind at ease.
Harrison: Managing your recipients made easy with SurveyMonkey Contacts

We’re not going to lie. Handling large lists of respondents can be one of the most tedious parts of the survey process. But fear not. Our revamped Contacts feature is here to make your life easy.
Contacts provides users with the full customization of an online address book, all within your SurveyMonkey account. Within this page users have the opportunity to create custom lists of contacts so that sending out surveys to specific groups is quick and super easy to repeat in the future.
With Contacts you can now create easy to manage groups. These groups allow you to manage who you’re sending your survey to without the need to scroll through a long list of email addresses. When importing your contacts initially, simply check the Add to Group box to ensure that when your contacts get imported, they’re well organized and accessible. You can also include a respondent’s name or custom data to show side by side with their responses, or include in your outgoing Email Invitation.
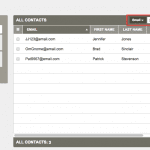
Navigating your contacts with the Search Contacts field makes it easy to track down and manage respondents. From there, you can add respondents to groups by clicking on the checkbox next to their email address and specifying which group you’d like to add them to. It’s that easy. Getting organized with Contacts makes the decision of who to send your survey to effortless, and lets you focus your time and energy on the fun stuff—survey design, collection, and analysis.
Casey: Error messages done right

Have your respondents ever reported strange error messages that prevent them from continuing to fill out your survey? Perhaps they tried to submit a comment and this error message appeared: “The comment you entered is in an invalid format.” They answered the question, so what specifically about the format of their answer triggered this message?
It’s possible the question is a text box that is set to accept answers between 0 and 500 characters in length and the respondent tried to submit an answer with 700 characters. But there the respondent is—stuck—not knowing what to do. No survey designer wants that.
Luckily, there’s a simple way to avoid this confusion and create a more user-friendly survey. You can edit the preset error messages to more accurately describe the answer validation settings so your respondents don’t get confused.
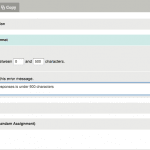
For example, the problem described above could have been avoided if the error message had said something like, “Please make sure you enter in a whole number between 0 and 1000.”
But where and when can you edit these error messages? Every time you check a box to make a question required or add validation settings, a text field will appear where you can edit the error message. The text field will also appear if you add an “Other” option and choose to add validation settings to it.
If you happen to be using our Classic Design version, you can find these settings at the bottom of the question editor and on the Edit and Options tabs in the question editor of New Design.
Now that you know how to write a good error message, your respondents will have a jolly good time taking your surveys. We promise.
Katie: Skip your respondents down a path to better data

Logic. It’s what helps us solve everyday problems. And in the survey world, Skip Logic is what helps take your respondents down a particular response path in order for you to gain insights on the questions that pertain to them.
One question that you, dear customers, ask a lot is how can you move a respondent to another part of their survey based on an answer to one of their questions?
Lets say you ask a simple Yes/No question on whether the respondent shops for gifts at the mall. If the respondent answers “Yes,” then you want to send them to questions about shopping at the mall. If the respondent answer “No,” then you want to send them to questions asking about why it is they don’t shop at the mall. This is where that handy logic comes in.
SurveyMonkey’s Skip Logic, or conditional skips, can be added to any closed-ended question: Multiple-choice single-answer, multiple-choice multiple-answer, or rating scale questions that only have a single row. There are two types of logic:
- Question Logic: Applied directly to the question and their answer choices. This will lead respondents to a forwarding question or page.
- Page Logic: Applied to the page as a whole. This will lead any respondents of this page to a forwarding question or page.
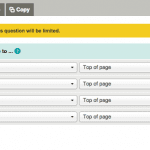
Skip Logic also comes in super handy for disqualifying respondents, consent forms, multi-language surveys, employee evaluations, and much more. So hop to it, and set up some Skip Logic to ensure your respondents are getting relevant questions and you’re getting the data you need.
Well, that’s it for our top tips of 2014. Have any tips of your own—or questions for our SurveyMonkey experts? Let us know in the Comments below! And don’t forget to visit our amazing Help Center for even more handy tips & tricks.

