Let’s face it, survey results are more fun when shared. The Share Responses link and Instant Results features are great ways to show your survey audience a quick view of the survey results.
Our Piping feature gives you the ability to show respondents their answers to questions within the survey. This is not the main intention for the creation of our Piping tool, but it happens to be a great workaround if you need to show respondents their individual answers and don’t have the time to export and filter out their individual data.
This use of Piping was utilized in our recent survey that we created for our March Madness Sweet 16 Tournament. To get started with Piping, you first need to create all of your survey questions. Multiple Choice (One Answer Allowed), Comment/Essay Textbox, and Single Textbox question types allow for the responses to be piped into other question types.
Once the questions have been created, you will want to create a Descriptive Text question type on the last page of the survey. This is where you will be able to pipe the response from a previous question. Do this by first entering regular text, such as “Here are your answers,” and then include the codes for the piped answers, and save the question.
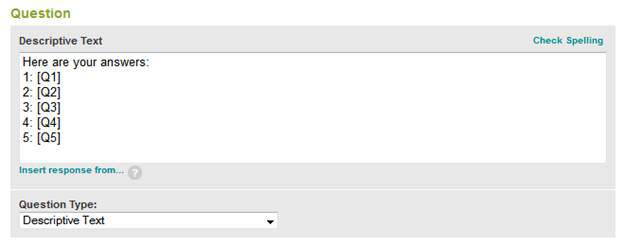
Respondents will now be presented with a copy of their responses on the last page of the survey.

You can also inform respondents that they are able to print the results of their survey through the web browser.
By using different descriptive text question types and placing them side by side of each other, you can make even more advanced summaries which can be used to show respondents their responses for a bracket, as we did for March Monkey Madness:

Have you used survey Piping to share survey results with your respondents? Or do you have an idea for a survey using the feature? Sound off in the comment section below!