It’s always exciting to put together a survey, send it out, and eagerly wait for the responses to come back. It’s particularly inspiring when you look at your data and see you’ve collected high-quality, insightful information.
But where do you go from there?
For example, say you get some great insights from a customer satisfaction survey you’ve sent out and you’d like to share your data with all relevant stakeholders. What’s the best way to share it?
It’s a question that a lot of people write in about: How do you share your results with members of your organization or with the survey respondents themselves? The good news is that SurveyMonkey has tools that make it easy to send and share out survey results.
1. Share a web link
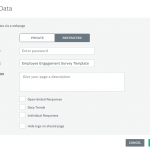
The first option is to share your survey results from the analyze section of the survey. This is great option if you’d like to share a summary of your survey results and want to control how private (or public) you make the results. The link that you send out also updates every 5-10 minutes, so those with a link can have up-to-date data.

You’ll notice that there are a few options to sharing your survey results. You can allow anyone with a link to see the results, or, if you’re concerned about the data's security, you can add a password to safeguard the results from the link.
2. Send your respondents instant results
Want to let your respondents see how their responses to compare to those of other respondents? The best option is to show them the instant results of the survey. When you turn on instant results, your respondents will get a real-time summary of any data collected so far once they’ve completed the survey.
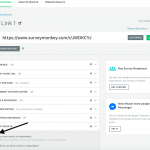
It’s important to note that this view won’t show the respondents their own individual results or others’ results, it’s simply an overview of everything collected so far within the survey.
Instant results is a great option if you’d like to give your respondents a quick glance of the results collected so far. For example, a person responding to an event feedback survey might want to know what the overall sentiment of the event was, or someone who took a customer took a customer service survey might be interested to know if others agreed with them.
3. Manually export data
Want to get your survey results into a presentation-ready format? Last, but not least, the manual method of sending out survey results is to export the data.
Exporting your data allows you to create an offline copy of the results so you can use them in presentations or share them individually. You can export your data in any of our paid plans using any one of three different export types: Summary Data, Response Data or Individual Response.
If you are after a report that is easy to read, great charts and graphs that are presentation ready, it’s probably best to export the data in a summary report using a PDF, PPT or XLS format. Other export options include XLS and CSV file types.
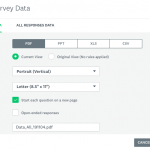
If you need the raw data in a table form then choose the ‘response data’ option, exported into an XLS format. This will also allow you to see how the respondents answered the survey and compare their answers. Response data is a good option if you want to analyze the data on your own, or create your own charts. The export options are XLS, Google sheets, PDF, or SPSS (on a paid plan).
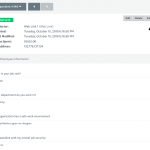
Finally, you can export each response separately by clicking the Individual response tab, selecting the response of your choice, and clicking the Export button.
No matter what your use case is, there’s a way to share your data that will work for you. Whether you’d like to send out your survey results instantly, do it selectively, or break down the data to be presentation ready, these examples should point you in the right direction.
Ready to start sharing your results? Sign in and get started!


